1. Authorization flow
Giả sử ứng dụng của chúng ta có 2 roles: User và Admin. Mỗi role chỉ truy cập vào những API được cho phép. Làm thế nào để server biết được JWT token của request hiện tại đang là User hay Admin?

Trong phần 01 chúng ta đã lưu role của account đăng nhập bằng với GrantedAuthority objects được implement tại createSpringSecurityUser()
"ROLE_"AuthenticationService.java
/**
 * @author <a href="mailto:phuongdp.tech@gmail.com">PhuongDP</a>
*/

@AllArgsConstructor
@Service
public class AuthenticationService implements UserDetailsService {
    private final AccountRepository accountRepository;

    @Override
    @Transactional
    public UserDetails loadUserByUsername(final String account) {
        return accountRepository
                .findByAccount(account)
                .map(this::createSpringSecurityUser)
                .orElseThrow(() -> new UsernameNotFoundException("Account " + account + " was not found in the database"));
    }

    private org.springframework.security.core.userdetails.User createSpringSecurityUser(Account account) {
        List<GrantedAuthority> grantedAuthorities =
                Collections.singletonList(new SimpleGrantedAuthority("ROLE_" + account.getAuthority().name()));
        return new org.springframework.security.core.userdetails.User(account.getAccount(), account.getPassword(), grantedAuthorities);
    }
}
2. Authorization with hasRole()/hasAnyRole()
Chúng ta phân quyền api theo role dựa trên request url như sau:
-
Protected API với prefix
"/api/admin"thì chỉ role Admin có thể truy cập.
Method hasRole() có ý nghĩa rằng chỉ những role được chỉ định bên trong mới có thể truy cập API với prefix tương ứng, chúng ta sẽ config như sau:.antMatchers("/api/admin/**").hasRole(Role.ADMIN.name())
-
Protected API còn lại (
prefix != "/api/admin") thì role User + Admin có thể truy cập
Vì trong system chỉ có 2 role nên với yêu cầu trên chúng ta không cần config thêm gì.
hasAnyRole()Ví dụ:
.antMatchers("/api/user/**").hasAnyRole(Role.USER.name(), Role.ADMIN.name())
SecurityConfiguration.java
/**
* @author <a href="mailto:phuongdp.tech@gmail.com">PhuongDP</a>
*/
@EnableWebSecurity
@EnableGlobalMethodSecurity(prePostEnabled = true, securedEnabled = true)
@AllArgsConstructor
public class SecurityConfiguration extends WebSecurityConfigurerAdapter {
private final CorsFilter corsFilter;
private final TokenProvider tokenProvider;
private final JwtAuthenticationEntryPoint jwtAuthenticationEntryPoint;
@Bean
public PasswordEncoder passwordEncoder() {
return new BCryptPasswordEncoder();
}
@Override
public void configure(HttpSecurity http) throws Exception {
// @formatter:off
http
.csrf()
.disable()
.addFilterBefore(corsFilter, UsernamePasswordAuthenticationFilter.class)
.exceptionHandling()
.authenticationEntryPoint(jwtAuthenticationEntryPoint)
.and()
.sessionManagement()
.sessionCreationPolicy(SessionCreationPolicy.STATELESS)
.and()
.authorizeRequests()
.antMatchers("/api/login").permitAll()
//.antMatchers("/api/user/**").hasAnyRole(Role.USER.name(), Role.ADMIN.name())
.antMatchers("/api/admin/**").hasRole(Role.ADMIN.name())
.anyRequest().authenticated()
.and()
.httpBasic()
.and()
.apply(securityConfigurerAdapter());
// @formatter:on
}
private JWTConfigurer securityConfigurerAdapter() {
return new JWTConfigurer(tokenProvider);
}
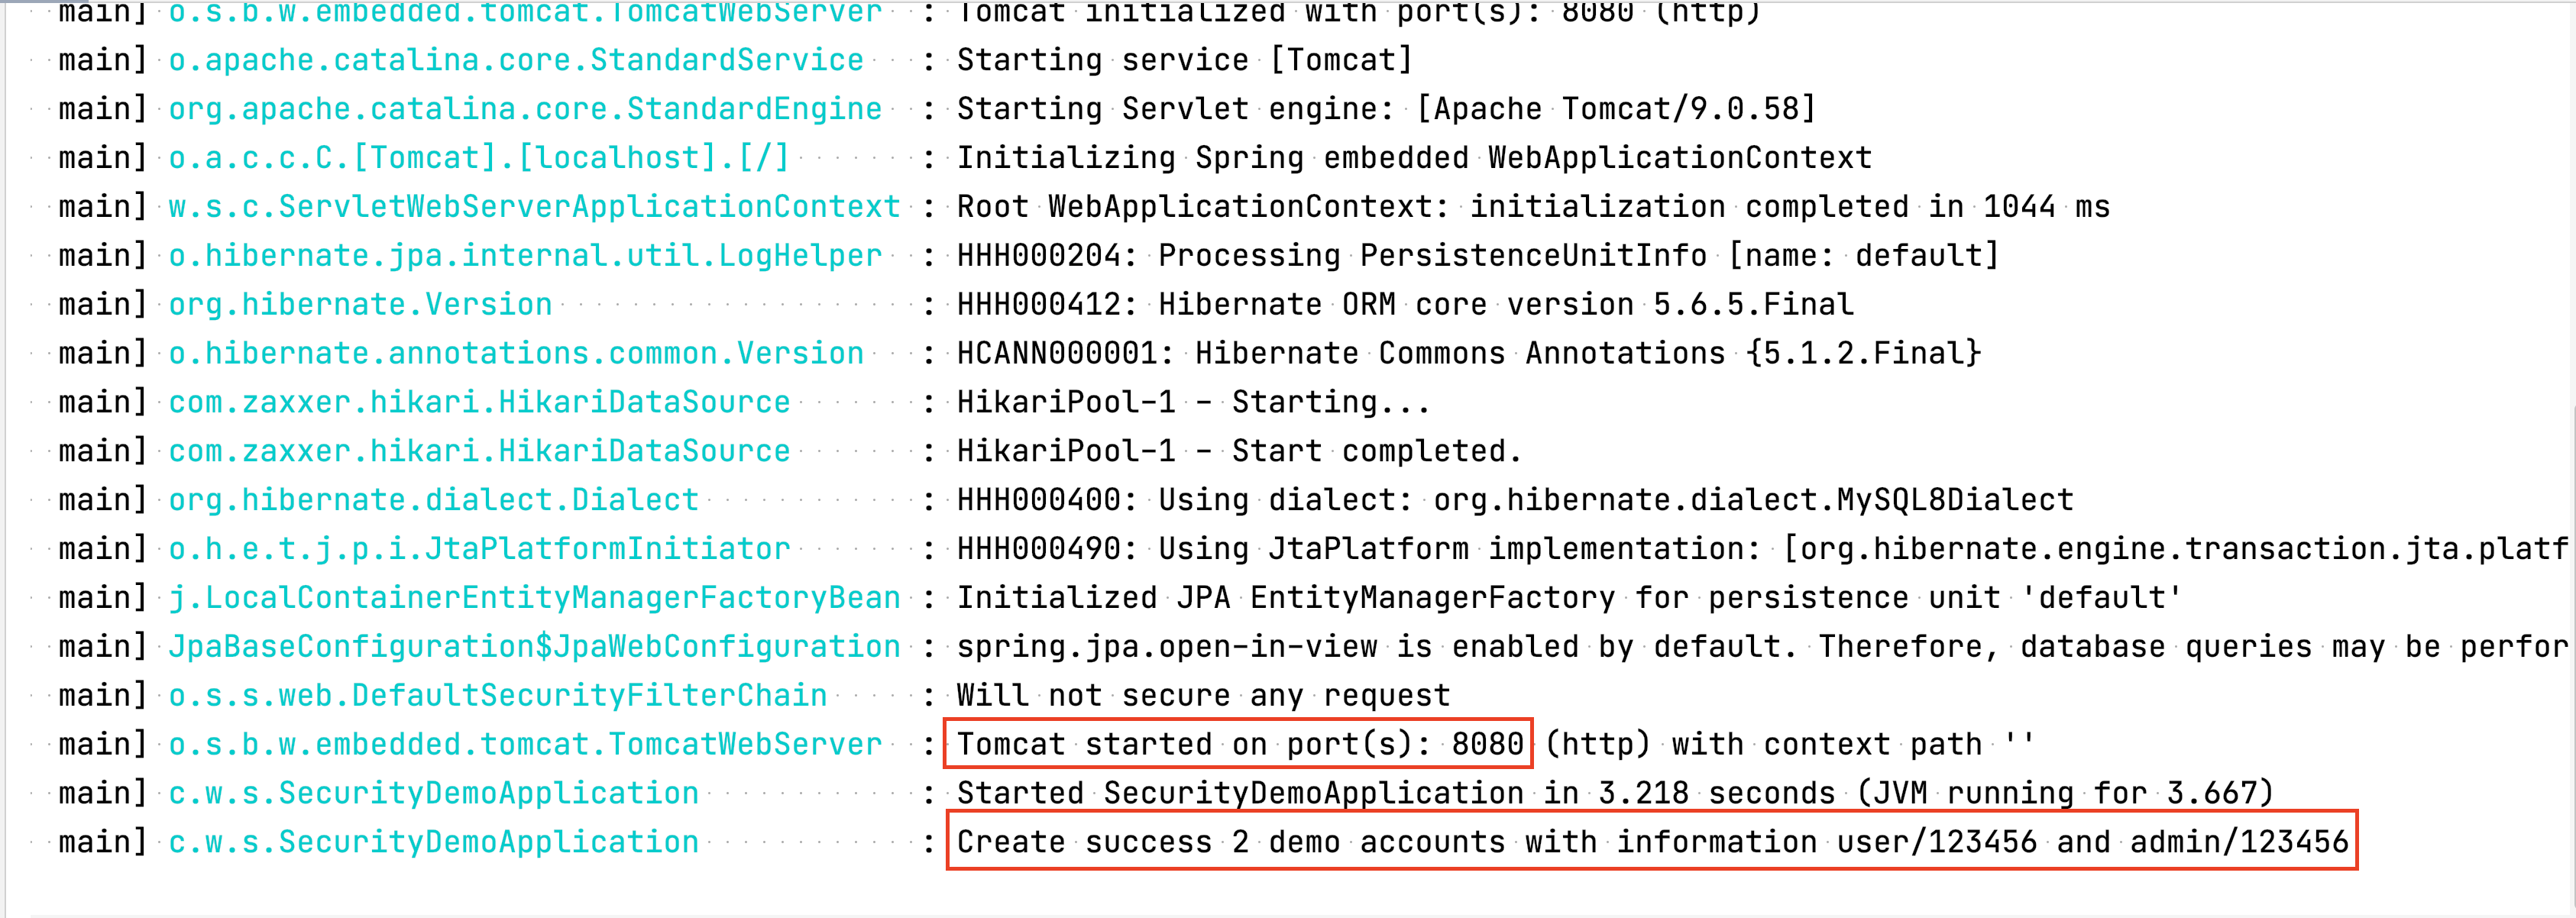
}3. Testing
Khi start app tôi đã sử dụng CommandLineRunner để khởi tạo 2 accounts: user/123456 và admin/123456
Chúng ta sẽ thực hiện test với matrix như sau:
| Role | API: /api/user/** | API: /api/admin/** |
|---|---|---|
| USER | ALLOWED ACCESS | DENIED ACCESS |
| ADMIN | ALLOWED ACCESS | ALLOWED ACCESS |
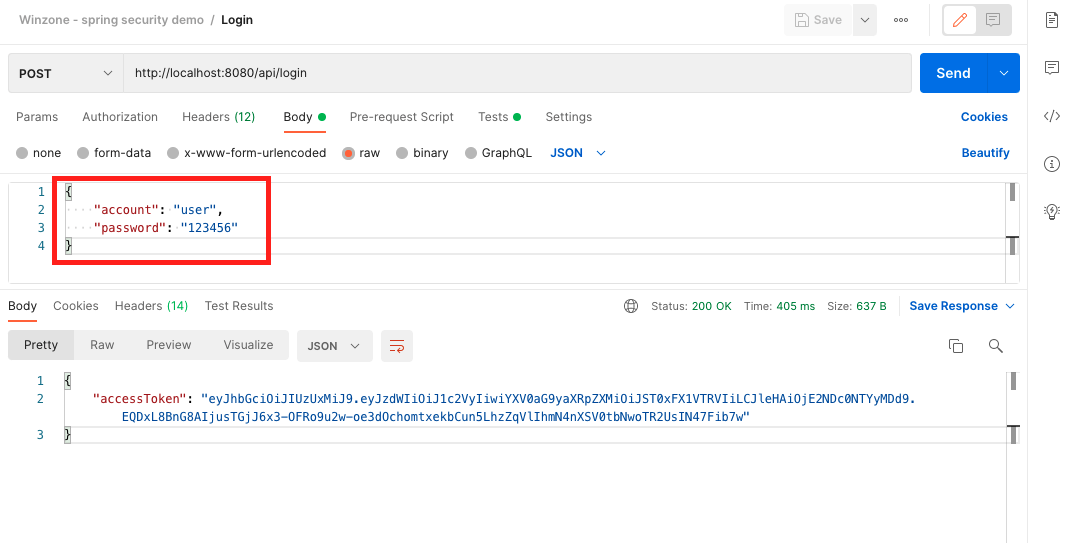
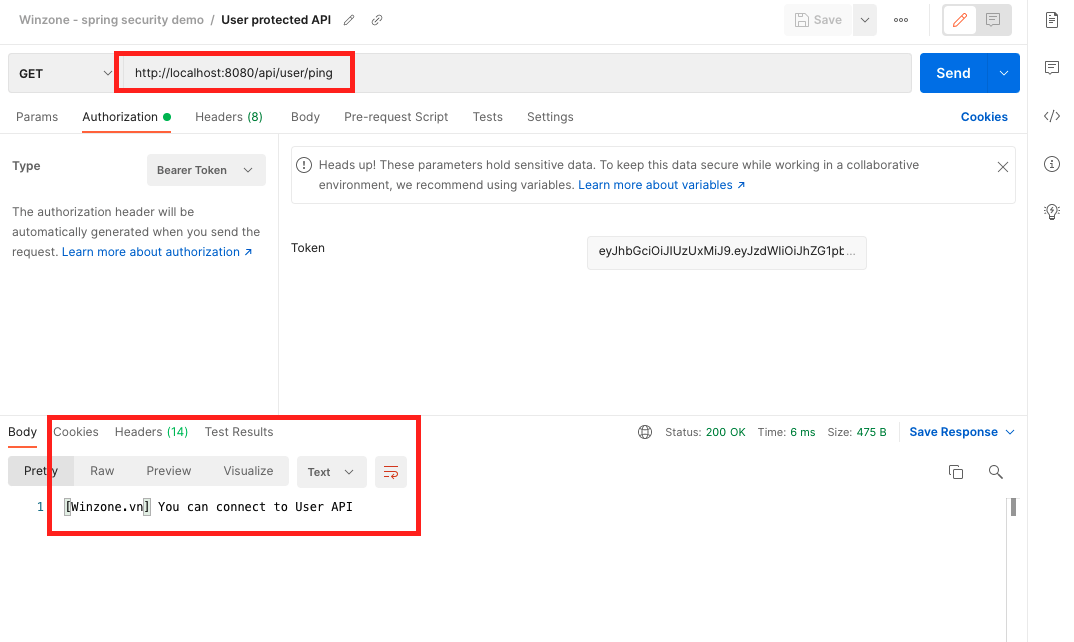
Thực hiện test role User
Call API login với thông tin account user/123456 để nhận về JWT token
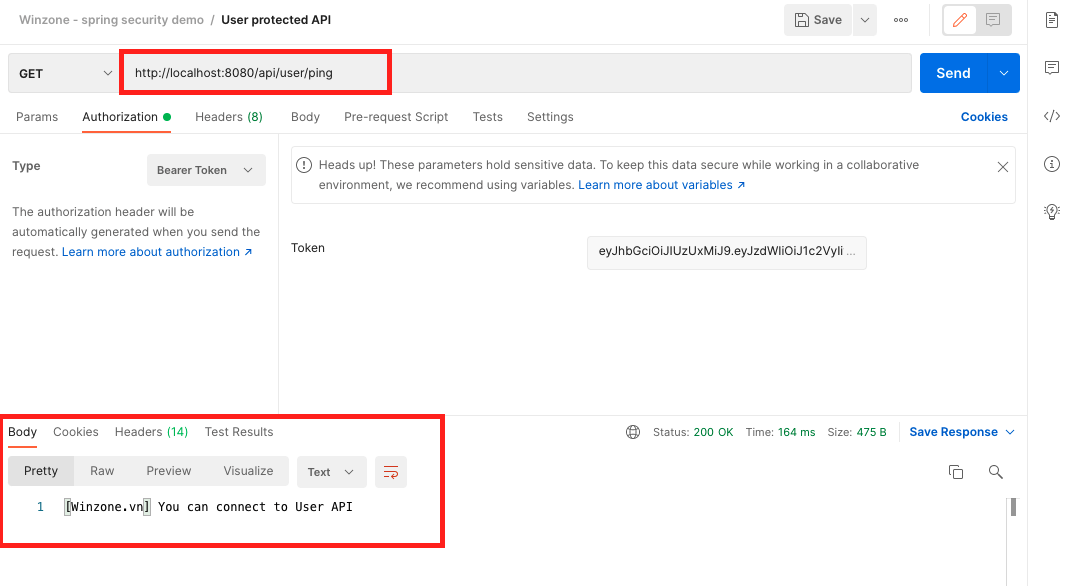
Sử dụng JWT token vừa nhận được add vào request header và call protected API của User role. Kết quả mong đợi sẽ là ALLOWED ACCESS
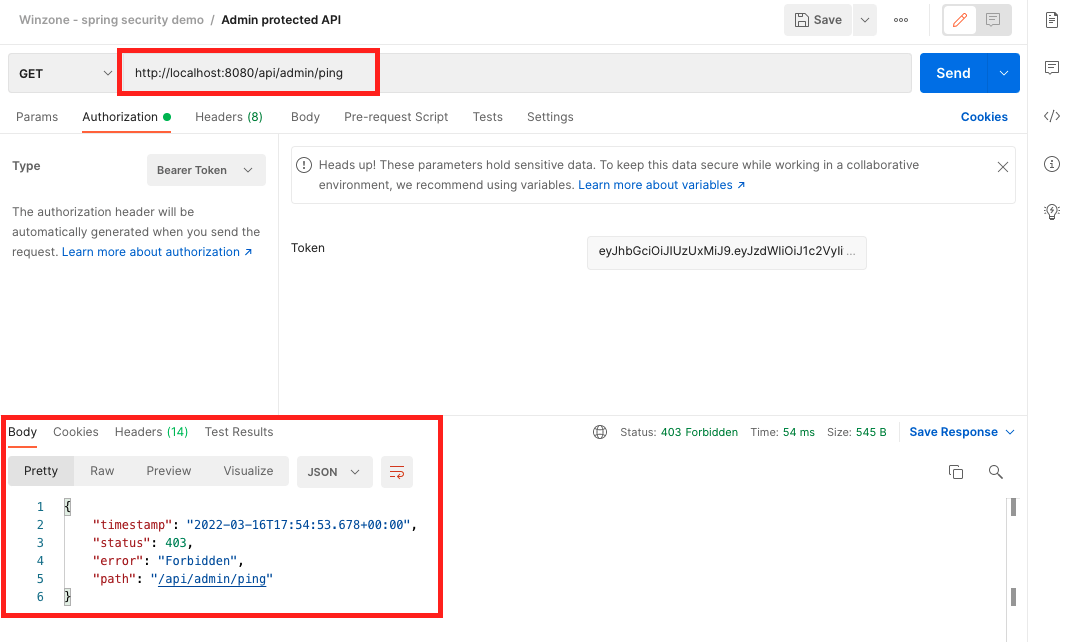
Vẫn token đó được add vào request header và call protected API của Admin role. Kết quả mong đợi sẽ là DENIED ACCESS
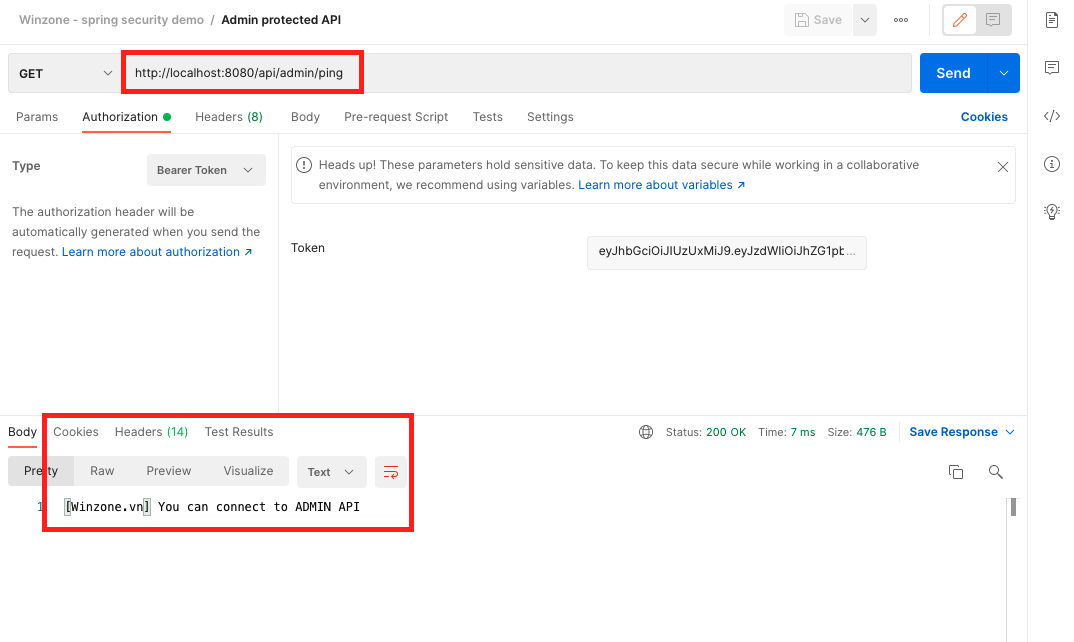
Thực hiện test role Amin
Call API login với thông tin account admin/123456 để nhận về JWT token

Sử dụng JWT token vừa nhận được add vào request header và call protected API của User & Admin role. Kết quả mong đợi đều là ALLOWED ACCESS
6. Conclusion
Với spring-security chúng ta cũng có nhiều cách thức triển khai Authorization. Trên đây là 1 cách thức đơn giản sử dụng methods: hasRole() hoặc hasAnyRole()
Hi vọng rằng sau series này các bạn có thể hiểu và áp dụng đầy đủ Authentication và Authorization cho với app của mình.